An climbing anchor is a system comprising individual anchor points which are connected together to make a master stage the rope or climbers clip to be securely connected to the stone. Whether you are top-rope climbing or direct climbing, understanding how to construct a good anchor is absolutely essential to staying protected.
There are numerous factors in anchor construction, which makes it impossible to demonstrate how to build an anchor for each and every situation. The objective of the guide is to provide you an comprehension of the essentials of anchor construction whilst demonstrating a couple of common methods to construct an anchor.
Before you construct an anchor, first you must identify what you are likely to use as anchor points. Everything you decide to use mainly depends upon where you are and exactly what equipment you’ve got available.
Natural anchors, like trees and blocks of stone, can make excellent anchors and assist you conserve additional equipment. But you will need to rate the ethics of the features before integrating them within an anchor system.
- Trees: Before you take advantage of a tree, then check to be certain it’s living, well-rooted and strong. Be skeptical of trees growing from cliffs and always examine a tree by pushing it using a foot. A fantastic guideline is to just use a healthy tree that’s at least 12 inches in diameter. To utilize a tree as an anchor point, you can circle a runner round the bottom of this shrub and then clip the ends with a carabiner, or girth-hitch a lengthy runner round it.
- Stone features like horns and chockstones (a rock that is tightly wedged in a fracture ) are often used as part of a anchor. When assessing the ethics of them, check to ensure they’re strong and well attached. Search for fragile stone and cracks which indicate that a weakness. With horns, it is possible to loop a runner on the upper and clip it into the rope. To attach the rope into a chockstone, circle a runner round the characteristic and clip the ends with a carabiner or girth-hitch the runner.
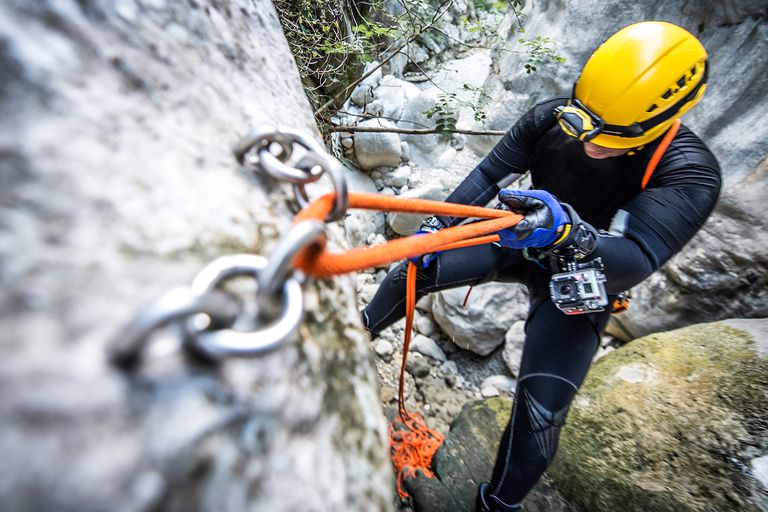
Fixed anchors are some other kind of artificial equipment that once housed is left permanently”fixed” into the stone. To attach the rope, then you clip quickdraws or runners into the equipment.
Just like with natural anchors, fixed anchors will need to be assessed for indications of weakness. If you notice cracks or excessive rust or wear, then the fixed gear might not be trustworthy. Be skeptical of obsolete equipment, particularly 1/4-inch bolts and sheet-metal-style hangers. The present standard bolt dimensions is 3/8 to 1/2 inch .
Removable anchors, for example cams and stoppers, are utilized where fixed and natural protection aren’t offered. To find out more about setting cams and stoppers, visit our post, Lead Climbing: How to Put Trad Gear.
To create an anchor, you join the respective anchor points to make a master point which you simply clip into. A normal anchor will have three or two anchor points which maintain a downward pull and also one which is going to hold an upward tug.
To create an anchor, you have to join these anchor points and equalize them that the load is distributed evenly among them.
You generally equalize an anchor using a very long section of attachment cord known as a cordelette. There are two key procedures for equalizing the backbone: static equalization and self-equalization.
Static equalization identifies an anchor system which incorporates multiple anchor points which are tied off together. When the machine is tied away, it doesn’t have any idle or adjustability within it. Anchors with static equalization are fantastic for climbs which have a very clear way of pull, like straight down. If you expect the direction of pull shifting, it is ideal to create a self-equalizing anchor (see below).
Cordelette Anchor: by means of a cordelette is a remarkably common method to join two, three or even more anchor points to make static equalization.
To earn a cordelette, choose an 18–20 ft. long part of seven- to eight-millimeter Perlon attachment cable and utilize a double fisherman’s knot to tie the cable into a huge loop.
- Pull Back on the carabiner to even out the pressure in each of the strands of this cordelette.
- Position the fisherman’s knot so it’s under the maximum anchor point to keep it clear of this master stage knot you will tie.
- Learn as best you can at which the drive on the anchor will probably come out of and pull on the carabiner in that way.
- Tie three segments together using a figure eight knot to produce the master stage. If you do not have sufficient cable to tie a figure eight, then tie an overhand. Both knots are powerful, however, the overhand is more challenging to untie after it’s been weighted.
- Give the carabiner a tug to be certain all 3 anchor points are evenly weighted.
- The loop made by linking the amount eight is known as the master stage and it ought to be approximately a few inches in diameter. This is the most important attachment point to the anchor and that is wherever you and your climbing partner will clip .
The downside to a cordelette is that in case the management of pull varies slightly, then 1 bit from the anchor system may wind up carrying the whole load.
Self-equalization is a method of building an anchor so it adjusts to changes in the direction of pull so as to disperse the load evenly into the anchor points. If you are aware that the management of pull will change during the climb, attempt to make a self-equalizing anchor.
The quad core is a fantastic alternative near the peak of a game rise in which you have just two side-by-side bolts. To make a quad core:
- Take your cordellete and twice this up so you’ve got four equal-length strands.
- Clip the exact same carabiner into one of those bolts.
- Hold on the other end of the cordelette loop upward into another bolt.
- Grab the very low point in your cordelette loop with your fist.
- Clip the exact same carabiner in the rest of the bolt.
- Produce the energy point of your backbone (at which the upper rope will clip ) by clipping 2 opposed locking carabiners to three of those strands which operate between the knots you tied before –depart the strand loose. This installation limits (grabs ) that the carabiners in case one facet of the backbone fails.
The slipping X is a comparatively easy means to link two anchor points, while developing a system which adjusts to the management of pull.
To make a sliding X
- Clip one sling into the carabiners at each anchor point.Catch the upper part of this sling, create a half spin and clip a locking carabiner to the spin and about the lower part of this sling.
A drawback to this slipping X is that if a single anchor point fails, then there’ll be substantial extension which will shock load another anchor point. The knots enable the system to correct, but restrict the expansion if a anchor line fails.
An equalette is yet another way to build a self-equalizing anchor by blending elements in the cordelette along with the slipping X. It gives powerful self-equalization and effortless adjustability.
To create an equalette:
- Require 20 ft. of seven-millimeter or eight-millimeter nylon cable attached into a loop using a double fisherman’s knot.
- Position the fisherman’s knot so it is about 18 inches from the base of the U.
- Beginning in the base of the U, tie two overhand limiter knots approximately ten inches apart to produce the master stage of this equalette.
To construct an anchor using an equalette, place the isolated centre section toward the expected direction of pull. Put the right-hand limiter knot roughly two to six inches beneath the bottom anchor point. Attach the proper arms of this equalette into the right-side anchor points with clove hitches or overhand knots on a bight. Now place the left-hand limiter knot in spite of the right-hand knot and then attach the left arms of this equalette into the left-side anchor points. Adjust the strands moving into the anchor points in order they are evenly tensioned.
Employing clove hitches to attach the equalette into the anchor points lets you efficiently correct the slack from the system to attain even tension on every strand.
Attach yourself to the anchor with 2 locking carabiners, every one clipped into the different strands of this power point situated between the limiter knots.
Every anchor you construct will probably be somewhat different. But, there are principles that are applicable to each one.
To create the fundamentals easy to consider, climbers have produced different mnemonic devices, for example ERNEST and SERENE. Regardless of which one you use, they serve as a reminder to what things to consider and look for when constructing a anchor. REI Outdoor School teachers use SERENE-A:
Solid: Every part of the anchor has to be totally solid.
Redundant: You should always use redundant elements when constructing an anchor that if one element fails, then the anchor won’t automatically fail. At minimum, utilize two strong anchor points. Make sure that all pieces of your backbone have built in redundancy, such as carabiners and slings.
Efficient: Make efficient use of time and equipment when you are constructing an anchor, and do not produce something that’s overly complex.
No Extension: Build your anchors to ensure if a single anchor point fails it will not cause the backbone to abruptly extend, which will shock load the rest of the anchor points and create high impact forces.
Angles: Take the angles generated by the Twist or slings on your backbone system. Bigger angles put more pressure on every anchor point, so maintain the angles to 60 degrees or less.
Every anchor you construct should satisfy the standards of SERENE-A. But simply as an anchor suits the SERENE-A, does not allow it to be perfect. Use this specific device for a reminder of things to look for, much less a guarantee your anchor won’t ever fail.
If you are climbing numerous pitches, it is vital to build a multidirectional anchor which could take care of a pull out of any way.
To understand this, consider what’s going to occur to the belayer in case a direct climber requires a fall. The power of the falling climber will pull on the belayer from the path the leader had been climbing and consequently it’ll deliver a tug in this path to the backbone. This can’t just slam the belayer to the stone, maybe injuring him or her, but it could also make the backbone to neglect if it had been constructed simply to take care of a pull out of 1 direction.
Since most climbs go normally upward, it is common to construct an anchor to defy a downward and pull up. Doing this can be as straightforward as putting a camera or nut that is aimed up and equalized with another placements employing a cordelette. It is ideal to put this bit low from the anchor structure so it will prevent the upward pull until it tugs to the other bits from the backbone.
It is likely to have a anchor point that may hold either an upward pull along with a downward pull. Bolts, strong trees and horizontally-placed cams are examples of anchor points that if used properly can hold pulls from the directions.
The horizontal spacing between anchor points and the duration of slings which you use to attach the points are crucial in making a trusted anchor. The bigger the angle, the force each anchor line will get, and conversely, the bigger the angle, the greater drive each stage is going to get.
By way of instance, at a two-piece anchor using an angle of 60 degrees, every anchor line receives 58 percent of this force. Boost the angle to 90 degrees and also the force on every ramps around 71%. An anchor using a 120-degree angle, distributes 100 percent of this force to every anchor point.
To be able to maintain the pressure on every anchor line from reaching harmful levels, the angles made from the sling or slings on your anchor should never be higher than 60 levels. This does not imply that you can not use anchor points which are spread far apart from one another. To make an angle that is less than 60 levels you may stretch the anchor points using extended slings or a cordelette.
Once you’re able to, build the anchor the master stage is situated between your torso and just over your head. This normally allows for effective belaying in the comfortable posture.
If you are constructing an anchor by means of a cordelette, you are able to raise the master stage by joining a figure nine knot as opposed to a figure eight. The figure uses more of this cordelette, thereby increasing the master stage. To tie a figure , begin just like you are linking a figure eight, but wrap the cord around a additional time prior to finishing the eight.